Dan's hobby workbench update August '21

Dan's been busy buying, building, painting and more buying. Proving that you can never be bored or run out of things to do when you have miniature wargaming as your hobby! This is Dan's latest hobby update for August '21. Hope this inspires you.

  939 Hits
  0 Comments
939 Hits
0 Comments

Hairspray chipping - first attempt

Hairspray chipping - first attempt work in progress. Pretty happy so far, progress update to follow plus a bit of a how-to guide if someone would like it. Let me know if you do want something?

  1076 Hits
  2 Comments
1076 Hits
2 Comments

French town square project

 I'm building a French town square for my French village for 28mm Bolt action. So far I have a blank space with a nice cobbled base courtesy of a texture roller from OTP terrain. Its a good first step I have also 3D printed some tables and chairs and a fountain as a start of the scatter terrain. Looking forward to painting.

  1354 Hits
  2 Comments
1354 Hits
2 Comments

Dans Hobby Update, April '21

Dans Back! And he shows us what he's been up to. Featuring Warlord Games' Battlefield Debris set, Luftwaffe Field Div and more finished stuff..(Incl. British Airborne of course!). Plus he shows off some loot he received from May '40 Miniatures Fallshirmjager kickstarter. Thanks for watching! 

  1232 Hits
  0 Comments
1232 Hits
0 Comments

Scale... (what? again you say?...)

New issues with scale. Lets say "a guy" already has scale phobia. Then "that guy" buys a 3D printer and has unlimited flexibility on how big he print things. Imagine how that will mess with "that guys" head... lucky I'm not like "that guy".

However, for this project at least, looks OK?

  1087 Hits
  0 Comments
1087 Hits
0 Comments

Rex's workbench update, Christmas break '20/'20

Its time for an update on everything that I got done over the Christmas break. Hopefully this motivates you to do more wargame hobby. There are a few tips and tricks here where I reveal my secret methods of doing things.

Let us know in the comments what you think and if you learned anything new or were motivated to start a new project.

  930 Hits
  0 Comments
930 Hits
0 Comments

A box arrived...

In the latest episode of "what the heck has Rex bought now?!", a box came in the mail today that looks a bit like this. (Or should I say a whole new new hobby came in the mail!!)

  1189 Hits
  0 Comments
1189 Hits
0 Comments

Rex's winter Germans

Finlay finished the first half of my winter German's. I really love these models from Warlord Games they are dynamic and characterful. I will add some more photos soon but honesty I couldn't wait to share this. Not only is this the best army I have ever painted it could be the best mini photo I have ever taken. That coalesces perfectly with our recent podcast on miniature photography here. If anyone is interested I will put up the paint recipe soon, subscribe to the blog or comment on this post to be notified.

Click on the image below to open the *huge* full sized image and then click or pinch to zoom in on that image to see the detail.

Hope this inspires you to paint and hobby more.

  1355 Hits
  5 Comments
1355 Hits
5 Comments

Clearcoat, clear as mud

Having completed an entire podcast on clear-coat (here), I thought I would take Dan's advice an purchase a can of Tamiya TS-80 flat clear-coat. I gave it a try and it went well, having taken that medication (or placebo) I felt all better and have been enjoying the TS-80 flat and "not-so-much-colour-knockback" effect. Recently though I painted up 3 of the exact same mini and I thought it would be worth while doing a more objective test. Below are three soviet squad leaders looking out across the broken cityscape for danger in the form of enemy in grey. Click on the image for the supersized version. The minis are clear-coated as follows:

  • One is sprayed with Testers Dullcoat
  • One is sprayed with Tamiya TS-80
  • One has not had any clear top coat at all

What do you think, can you notice the difference? Can you pick which is which? Do you have a preference?

A couple of things to say; Sure its not very scientific, its only in one light source. The light source is defused from a "softbox". Although I painted them all at the same time I seam to have used a different technique for the center one with the brushstrokes (sorry about that) but let me know your thoughts and I will let you know the answer.
And here is the result. Check the belt buckles for any difference.
  2255 Hits
  2 Comments
2255 Hits
2 Comments

Good Progress made..SS Reinforcements.

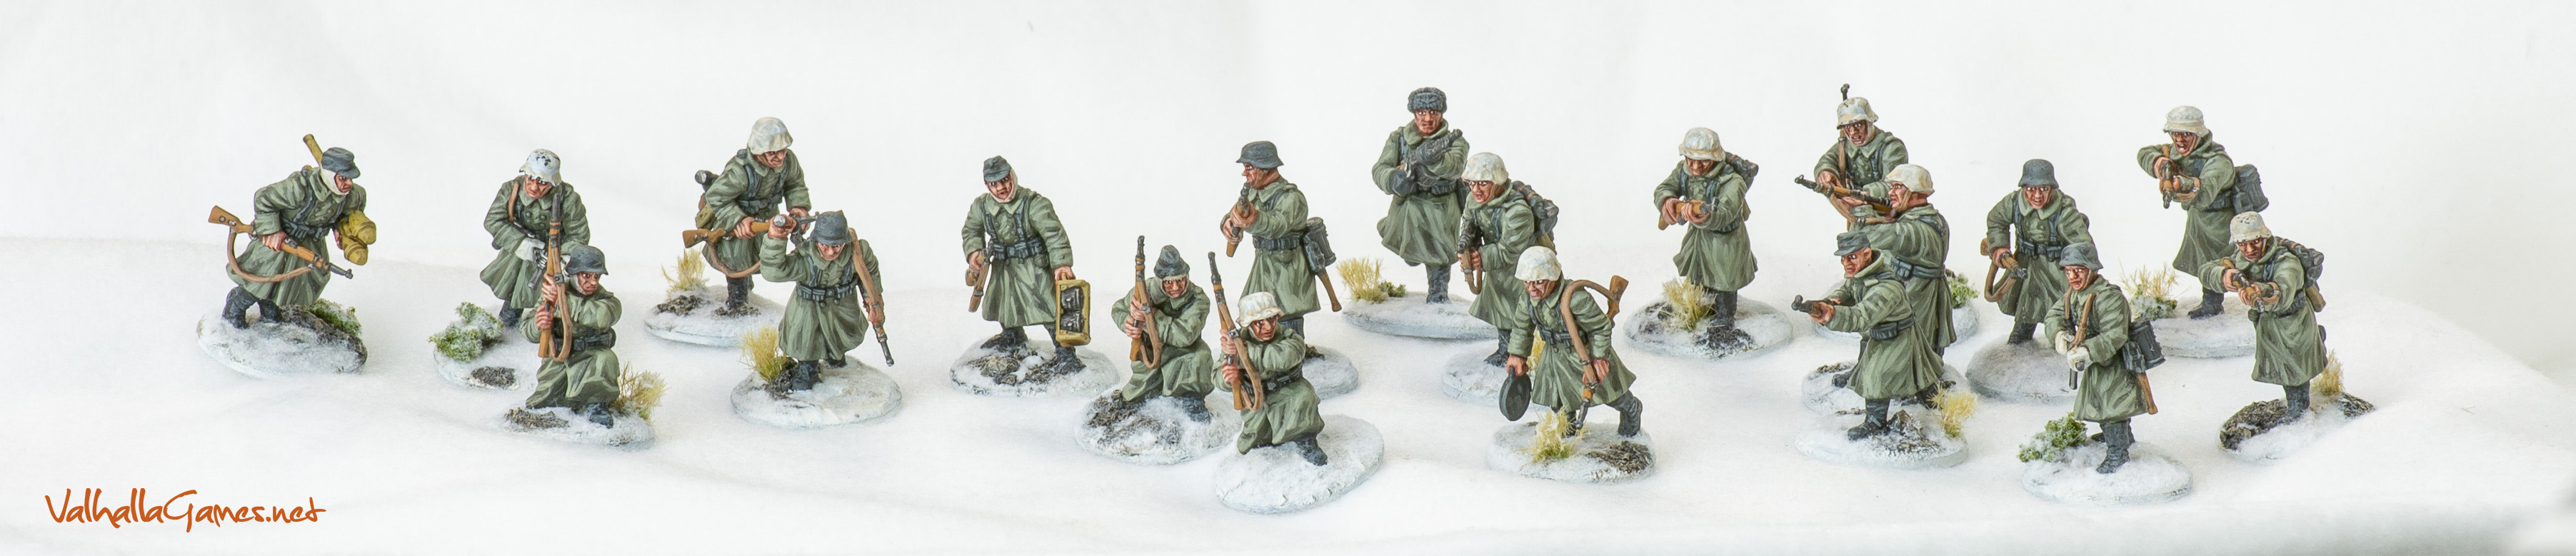
Needing To build upon the Waffen SS army that ive been working on so they can provide suitable enemy forces to my allies, I have been forging ahead, using the outside chance that I might get to Sydney for MOAB this year ( should it be run in the current COVID 19 circumstances!-Kids of the future ask your parents ;) as a deadline/ impetus to get the job done while in lockdown.


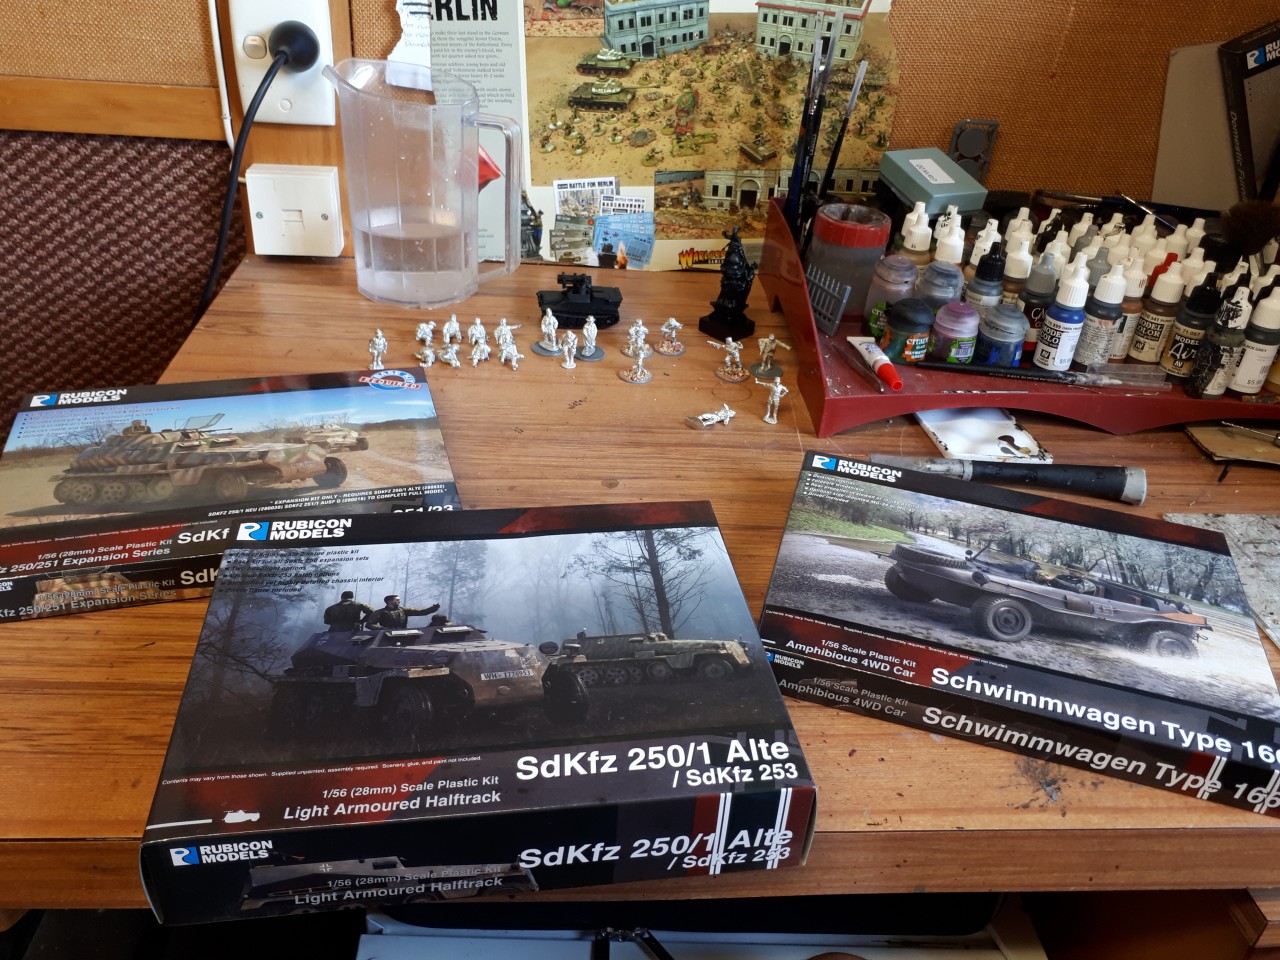
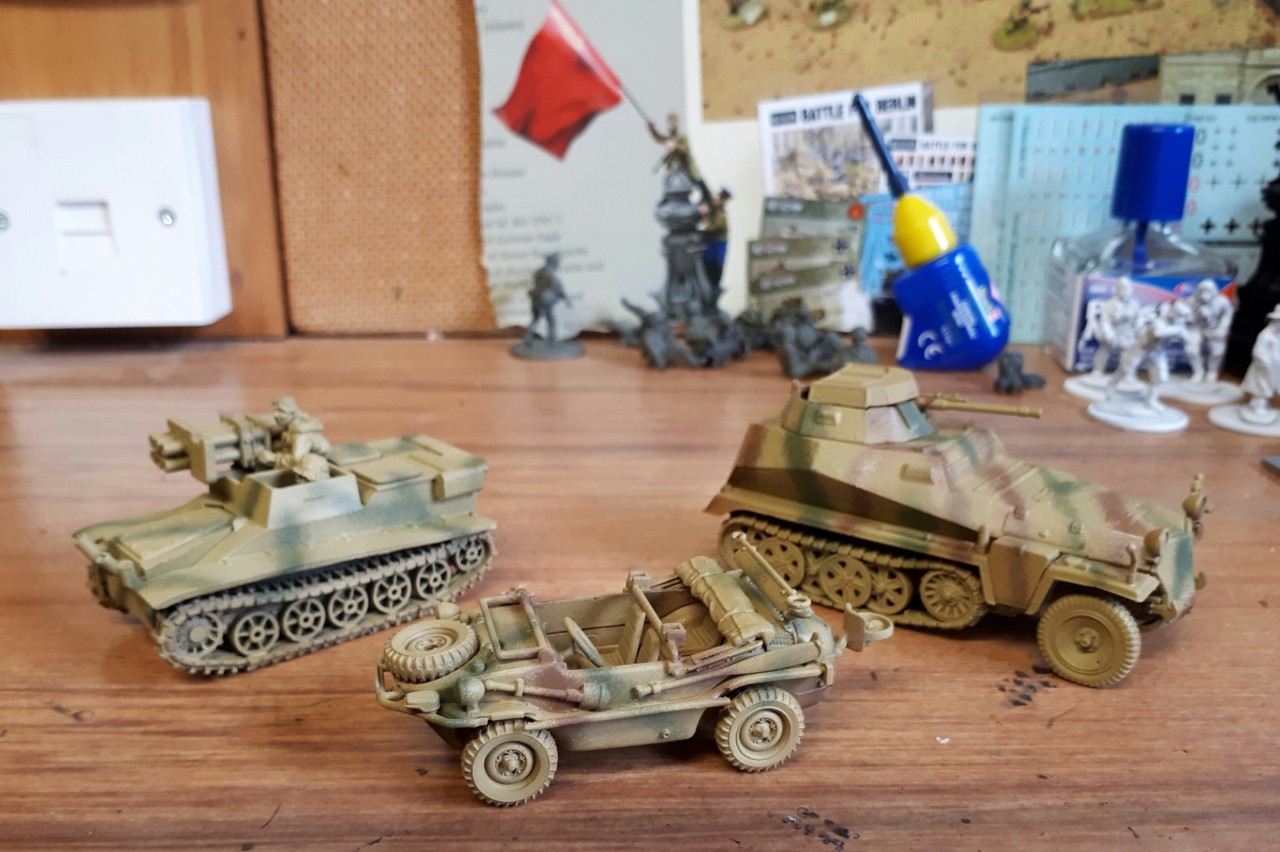
  Latest additions are some SS tank riders from the always-fantastic Offensive miniatures, and a pair of Rubicon models. I added the sdkfz 250/9 upgrade kit (also from Rubicon) as id always admired the build, and then having played against one in my chain of command game at Lard Island vs Richard Clark it looked so fantastic on the table i had to get one myself! 


The deliveries arrived the same day...

Once armed it was full steam ahead to get the models put together. This was honestly the ONLY time ive ever had an issue using my plastic glue on the Rubicon models. I DID get the plastic magic glue as a back up purely due to the fact i couldnt get any trusty citadel glue. But my issue was the application of said plastic magic..Honestly; the bushes provided coupled with the fact the level of the glue is so low they barely make contact, then the glue dries barren so fast i just gave up! and later i did regret it; various parts didnt glue as well as previously.

I really cant complain as they quite clearly state this may be the case. Its just that IVE never had this issue before with citadel glue. never mind, got there in the end.

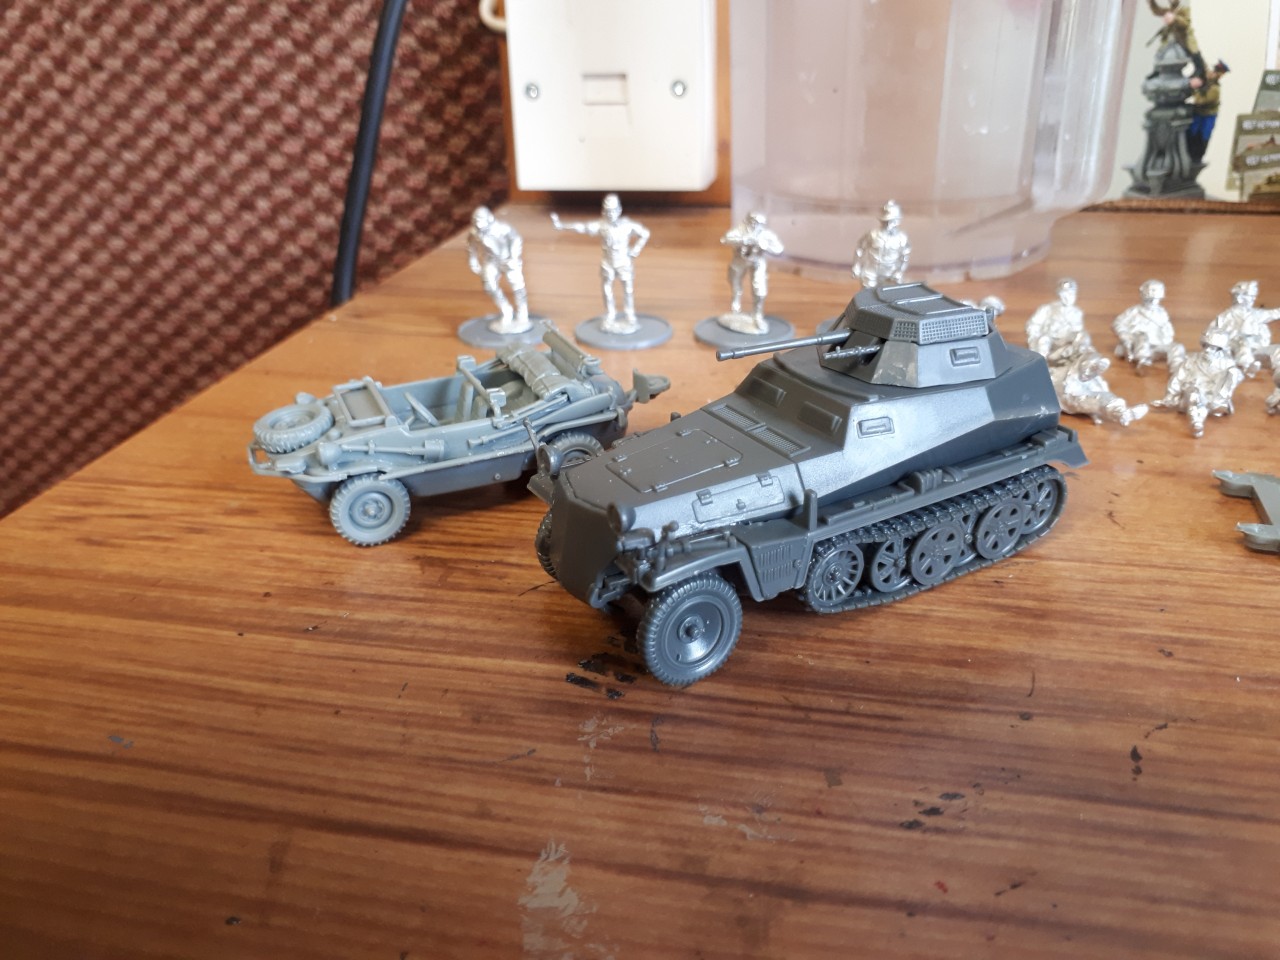
BTW- the pick in the pioneer tools on the opposite side to the photo shown below?..dont bother. it sits awkward on the stowage box on that side &  the hole guides they tell you to drill out are too big. MEH...leave it off and consider it stowed elsewhere from sight.

Incidentally; if you are wondering or had missed it ; YES! the 250/251 autocannon upgrade kits let you make  2 turrets each with cannon; 1x 250 alte , PLUS either a 250 Neu OR 251/23. good value. so ive kept the remainder so i can make a 250 NEU, as i believe the 251/23 wasnt actually produced except prototype. 


The schwimmwagon was lovely to put together also. Another fine model from Rubicon. One  suggestion i would have is leave the double-pioneer tools (on the side facing us in this pic) off until you apply paint and then the load /weight decal and then superglue the tools on. I didnt do this- my vehicle like many doesnt have the painted details intact. no issues. but if you want to apply the decal then try my suggestion perhaps.

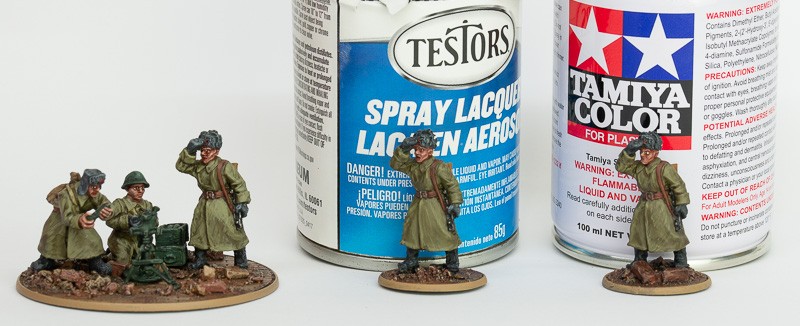
I grabbed another vehicle i needed to spray up and got out my long-suffering airbrush and whipped up some;

Dunkelgelb ( VMA Dark yellow), zenithal  highlights adding a tiny bit of ivory to the 'gelb.

Green camo; Tamiya NATO green

Brown Camo; VMC Flat Brown / Chocolate brown in a 66/33- ish!  ratio .

i used some blisterpack sponge and chipped with;  

firstly; the dunkelgelb mixed with a little VMC Ivory...just enough to stand out slightly against both the dunkelgelb base and the areas of the zenithal highlight also.

then when dry; VMC Black grey was  sponged on.

 A Burnt umber oil wash was used in a 'standard' way that scale modellers use to define detail and plates of armour etc. 

When everything was done, then all the details painted in to satisfaction, i used Tamiya TS80 flat clear spray ( as i always do!) to seal and knock back the sheen from the  thinner from the wash and the paints themselves. I love this varnish. it doesnt kill the vibrancy of the colours but makes the model lovely and Matt- try it! 

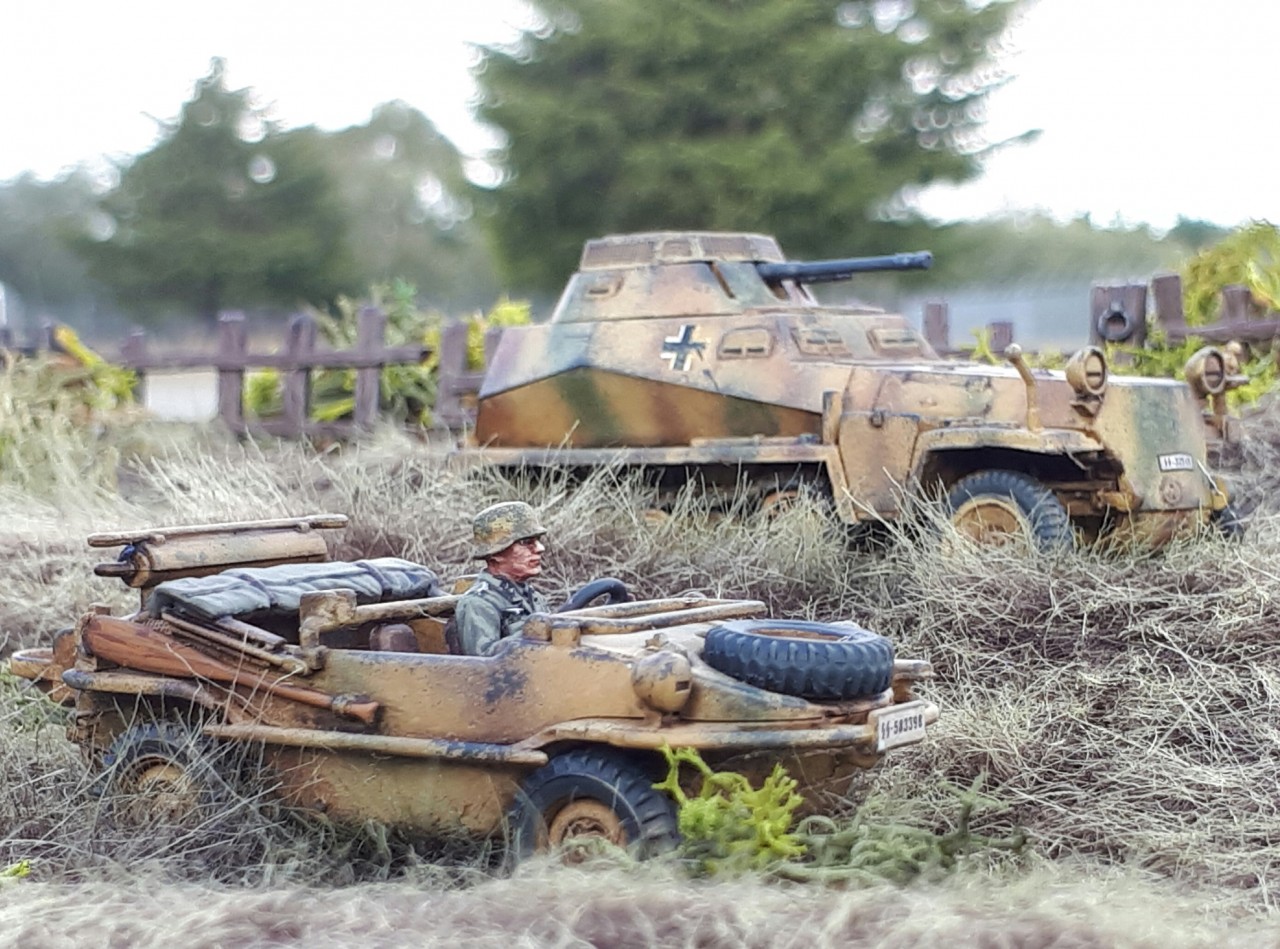
( The Borgward Wanze only got the green cam for a last levy cam pattern)


Its a shame that this schimmwagon kit didnt come with any plastic sheet to create a windscreen. I dont know if Rubicon provide that with other light vehicles. I did have some spare from warlord opel blitz kits but of course- id just used it elsewhere! never mind; at the moment mines kicked out following damage, and ill add one later if i wish.

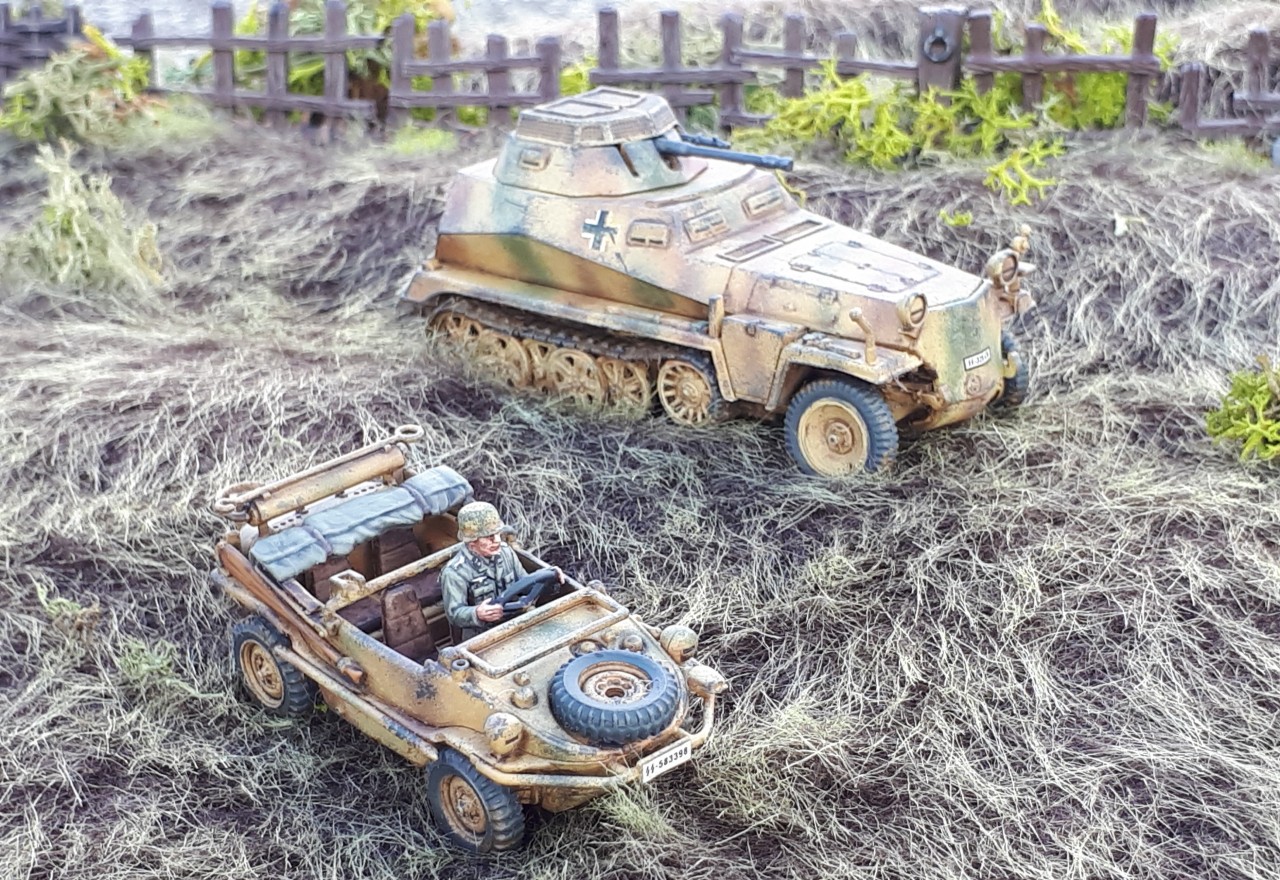
Heres some staged pics;

The subtle mud effect on the vehicles like all the ones i have done on this army are the "Vallejo Environment" product 73.826 "Mud and Grass", and a dusting from tamiya weathering makeup kit of dark sand and sand just to pick out tyre treads etc. 

Ive left the pair of optional pintle MGs of the swimmwagon at the moment, i can add them if i choose they just slip in and out of the pintle.

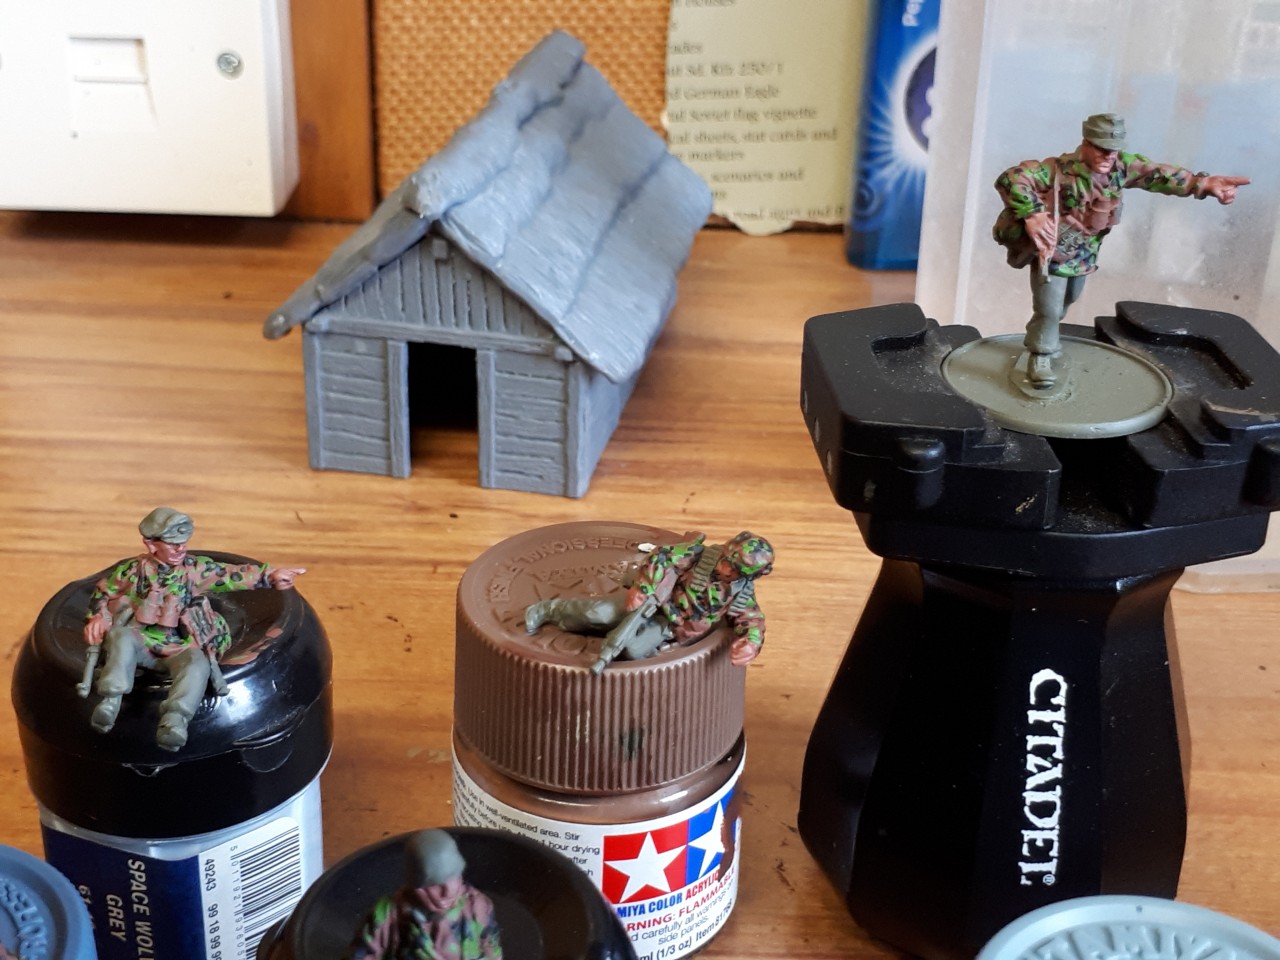
The tank riders work is underway and i aim to finish them off in the next few days.


  1948 Hits
  2 Comments
1948 Hits
2 Comments

"Operation: Upgrade! " Pt 1

Dan introduces a new painting challenge; how to upgrade a second hand Waffen SS force hes purchased and incorporate it into his current armies.

  1427 Hits
  0 Comments
1427 Hits
0 Comments

Marston tonight - game on this evening

 I got these magnificent trees as a Christmas present in 2018 now I'm rushing to get them ready for the game in about 6 hours. Don't call me a procrastinator I started 6 hours before I needed them!

  1389 Hits
  3 Comments
Tags:
1389 Hits
3 Comments

Miniature XPS Foam building first time build!

Even more
valhallagames

content!
Latest Podcast

Icon Pod
Latest Video
Icon Vid2

 Miniature XPS foam building first time build! Rex has lots of fun and ends up with a great result. Check out the finished product in this reveal video. A classic Mediterranean building for Bolt Action, Chain Of Command or any other 28mm wargame set in the Med. Hope the customer is happy! :-)

  2677 Hits
  0 Comments
2677 Hits
0 Comments

Flock 'n' Rocks

Test piece... on day when I have the real thing finished I will post a video.

  1441 Hits
  0 Comments
1441 Hits
0 Comments

Dans Painting scorecard 2019

So at this exact time last year; the beginning of my xmas holidays I started a scorecard of what id painted in the year. 

I admit to not always being current in updating it , but heres the finished list, as its been a year and i will start the 2020 scorecard as of now.


 DANS PAINTING SCORECARD 2019

  • 2 x King Tigers
  • 3 x Tiger 1's
  • 1 x German Opel Blitz canvas canopy/sideboards (interchangeable with existing passenger open back one)
  • 24 Italian Coastal Defense Division infantry ( Based by Rex- thank you!)
  • 2 x Italian heavy weapons teams
  • 1 x Italian Artillery piece incl. 3 crew and spotter
  • 15 x German FJ in smocks
  • 9 x German FJ Tropical fatigues
  • 17 x Late war German Heer infantry
  • 7 x Early war Heer '88 crew
  • 1 x Heer kwk 5 cm static gun and crew
  • 25 x  British paratroopers
  • 1 x Wehrmacht citroen staff car

Terrain;

  • 1x Italian Church
  • 1x Stone Bridge
  • 1.5 m2 of teddy bear fur hay and grass fields
  • Painted ONLY; 1x medium (!) Hill ( Made by Rex)
  • Painted ONLY; 1x small (!) Hill ( Made by Rex)
  • 1 x table worth of textured flexible rural roads
  • 1 x street barricade ( ponys, mattress, crate & sandbags)
  • 2 x concrete pillboxes
  • 1 x box Girder 'Primosole' Bridge ( Yes- I made and painted another one! Lol)
  • 30 x 'infantry dug in' entrenchments terrain pieces
  • 12 x urban rubble piles
  • 20 low stucco wall sections
  • 24 stone, wattle and wood fence/wall sections
  • 1 potting conservatory
  • 1 wrecked opal blitz with box loads
  • 8 various field entrenchments
  • 2 urban barricades
  • 1 x Tobruk bunker for static german gun
  • 5 x sandbag gun pits.

I dont think thats a bad list considering the amount of time i spend away ​and in the field in my job as well as working shifts whilst instructing  our trainees ..its one thing to  say one 'doesnt have time' its another to really physically not be with your models and hobby equipment for large chunks of the year, so...i think a job well done! 

I will start my new list as of now and keep anyone who cares updated on here! 


Regards,

Dan


  1404 Hits
  1 Comment
1404 Hits
1 Comment

" On the 12 days of Christmas, my paint queue gave to me....."

Not a day by day mission, but i do commit to painting the following by 31st January;

12 River sections....
11 Kreigsmarine and boat
10 germans on a transport...
9 warhammer quest doorways...8 Octagonal Octopii ...( nah not really, but I didnt have 8 of anything, so ive got a secret terrain project from gods of the number 8....!)
7 Questing characters
6 German HQ..
5 sets of scatter terrain...
4 Mediterranean Buildings...
3 T-34/85s ...
2 German Tanks....
And an FJ Pak 40 in a pear treeeeeeeeee......!!Hope everyone else has got some plans that involve some painting or hobby projects in some spare time these holidays. Regards, Dan.
  1529 Hits
  2 Comments
1529 Hits
2 Comments

Rock project

Even more
valhallagames

content!
Latest Podcast

Icon Pod
Latest Video
Icon Vid2

If you don't know already, ​I am making terrain boards. I'm trying to do the best I can do to make them as realistic as possible, I'm using a lot of new techniques or pushing on further with techniques that I already do. To that end I have purchased a woodland scenic rock molds and have cast up and stuck on some plaster rocks now I'm learning how to paint them to my liking.  The "its easy just do it like this" video by woodland scenic didn't work quite as planned and its a lot harder then what I expected probably because i'm mixing my own acrylic washes rather then using theirs. That's because it would take me 1000 years to use up all the products and they are relatively expensive.

Test 1

​Test 1, too dark (WAY) to dark need to water down the paint a LOT more

Test 2

Test 2, this was a lot lighter but more or less the same result??? I must be missing something.

Test 3

 Test 3, getting better, nice in fact but too red...

Test 4

Test 4, I like the result (not yet finished) but not the red colour. Off to the shop to get some more paint. Plus a few more casts required!!

Test 5

Test 5, happy with the colour just a little too strong. Getting close to what I want.

Test 6

Test 6 too light hitting on a roll of 2+ next turn...

Stay tuned for more excitement. I have had to create a couple of new units of measure they are called the; The black-current (a "black-currents" volume of paint), a pea (slightly bigger than a black-current), and a "SG" (that's 75% of a shotglass of water). Yes... I know!

  1866 Hits
  5 Comments
1866 Hits
5 Comments

XPS foam buildings and terrain (Part 1, it could be catching...)

Even more
valhallagames

content!
Latest Podcast

Icon Pod
Latest Video
Icon Vid2

XPS foam buildings and terrain, its like finding an unlimited box of free Lego under your bed! 

My first attempt is below which I did while watching TV last night. However seeing as overnight I literally I dreamed about building an entire city this way, there is no holding back now. (excuse the mini painting, I got him on ebay as part of a bulk lot)

Left, commercial resin wall. Right my most excellent(?) first attempt.
  2501 Hits
  0 Comments
2501 Hits
0 Comments

Soviet artillery clone wars

Continuing with my preparation for Moab 2019 I now have my 3d printed soviet medium howitzer painted up and ready to go, what it is missing is anyone to actually fire it. Being a 3D printed model of course it didn't come with any miniatures so off I went to the wargaming store to purchase Zis-2 anti-tank miniature (that I didn't really want) and team in order to get the crew miniatures because you can't buy the crew by themselves. 

Once I get them home, scraped off and ready to start painting I wondered if in fact being such a large gun it was only supposed to have 3 crew like the Zis 2 so I went to the rule book and had a look in fact it needed 4. Oh, there's a problem, in fact needed 5 because one of the main reasons that I took this unit over another Zis 3 was that it can have a spotter*. While I was on the job I had a quick look at my Zis-3 and to my surprise this unit actually has 4 crew as well even though only 3 come with the model!
Looking over the rest of the build I notice that my medium mortars have the required three guys but again no spotters soooo… in fact for my entire army including the Zis 2, Zis 3, medium artillery and 2 medium mortars (not that I would realistically use all of that at once) I am actually missing a total of 8 crew and spotter models so what's a man to do? Bear in mind at this point it's a week till the event and I still have to assemble paint and base all of these!

Solution; clone wars.
Obviously, I wouldn't do this to sell and honestly if I could just purchase the guys I would but I can't so out with mould making silicone and resin and "a while" later I have my 8 extra. I don't have a casting pressure pot and degas chamber so there are some small holes, and a few miscasts for the bin but at least now I'm ready to paint. 50 minute demold allows for a pretty quick turnaround.

The saga continues, now I only have 3 days to paint all of this and finish the rest of the army and "a fun challenge" is starting to wear a bit thin, more to follow.

Images below:

50% of the mould made
Completed mini, just needs a few holes filled and ready to paint
  1646 Hits
  2 Comments
1646 Hits
2 Comments

DIY medium artillery piece - 3D printing

I have always wanted a 3D printer just the same as I have loved the idea of making a mold and casing things. That concept of "Xeroxing" something in 3D really gets me going, perhaps it's the wargamers "more, more, more miniatures" thing where your army is never big enough and certainly one army is never enough. Sadly, I don't have a 3D printer, its not that I couldn't afford to get one I guess, its more like a recovering alcoholic shouldn't have "just one drink". I already have enough in my personal life plus wargaming plus photography plus wargaming-photography, now plus blogging and podcasting and videography as well I really don't need another hobby…. do I…?

However, the 3D printing came in handy in preparation for the Sydney MOAB 2019 wargaming event in which I decided to take an artillery heavy soviet WWII force to play bolt action.

I went to purchase a medium artillery piece from Warlord games, hmm nothing there... OK what about Rubicon, hmm nothing there either. Finally, a general web search for 1/56 scale soviet medium artillery models revealed exactly …. Zero.

With time running out what is a man to do? One thing that my web search did uncover was a free 3D print model of a Soviet A-19 122mm gun.

https://www.thingiverse.com/thing:2774391/

Now, even though I don't have a 3d printer I have a good mate Nathan who has one at his work, and being a fellow soviet player I though an offer of a free gun for him might entice him to print one for each of us, he took the bait and in a day or so I got a message to say the first one was done (sort of).

Now this is Nathans first try with the 3D printer and I don't know how good the free model was as well so I wasn't expecting too much but when I received the model, I was really pleased even though I could see there was a bit or work to be done and that plastic is HARD.

I got stuck in with scraper and sandpaper and a small grinder and some plastic putty and a few hours later I had something was passable. (See the progression of images below.)

So how did I go with my first impression of 3d Printing. On the plus side, in 4 hours I had a completed model exactly what I wanted, for exactly zero dollars. No postage no purchase and no waiting. Looking at the quality well its hard to just because this was a first effort, in the end the quality is passable, but it took a fair amount of work. Nathan says the second one looks a lot better and I assume different printers would give a better (or worse) result. 

I'm looking foreword to the future, if I could have purchased one (with crew) I would have done that instead, but if I need 2 or 3 (or 10!)... rock on 3D printing.

So now I have the gun the next thing I don't have is any crew, the story continues… 

THANKS Nathan!

More images below...

Continue reading
  1666 Hits
  2 Comments
1666 Hits
2 Comments

Latest podcast

Podcast EP24: A chat with Jon Russell:

The latetst podcast episode is live now. This should appear in your podcast app if you have subscribed (Search for valhallagames podcast in your app) or you can listen on web player (link below).

Podcast EP24: A chat with Jon Russell.

In this bumper episode, we are joined by Jon Russell of Warlord Games fame. In addition to his dedicated work for Warlord, Jon is a multifaceted wargamer and also veteran of many years service.

In this episode we spend time learning about Jon's wargaming pedigree, before learning more about his role at Warlord, the writing of 'Bolt Action: Korea', and Jon shares with us what he can about what Bolt Action V3 might look like, and the 'Raiders Attack!' Supplement that still has much life left in it.

All this plus Warlord event support, balance in tournaments and other definitely non-controversial(!), highly entertaining and informative topics. Sit back and enjoy a chat with Jon, and us, we hope you enjoy it as much as we did.

Subscribe in your favourite podcast app (search for valhallagames) or click here to listen in the web player.

Don't forget to check out the YouTube channel at https://valhallagames.net/youtube

...and don't forget if you would like to support us https://valhallagames.net/patron